Welcome to the Crochetville Blog Tour for March 15, 2016.

And welcome to my blog.
At most of the stops on this tour, everyone is telling you what they love about Crochet. I want to do something different. I want to tell you about what I dislike about Crochet. (I'm not saying HATE, because I think that's too strong a word for my feelings. "Dislike" is bad enough!)
I've been crocheting since I was 5 years old, when my grandmother taught me. And there have been very few times since then when I wasn't crocheting. I remember good times and sad times when crochet helped me cope. I remember times when I really wanted to crochet, but I had no time. And I remember times when I forced myself to make the time to crochet - even just a row or two. And in all those years, I've tried just about everything, every technique, in crochet - Tunisian, Hairpin, Broomstick, Freeform, Lace, Cables, Post-stitches, Extended Stitches, Color Work, Filet, Foundation Stitches, just about everything. And while my preferences for certain techniques, or stitches, or yarn to use, might have changed over the years, I wouldn't say I dislike any of the techniques that I may have deleted from my repertoire. I just don't have time for all of them. In fact, when I think about it, I really like just about everything "Crochet" - from how user-friendly it is, how my students at my lys get so excited when they learn something new or different, to what great things you can make. In fact, there are just 2 things (yes, only 2) that I can say I dislike about crochet. I'm going to tell you what these 2 things are, and I'm going to tell you what I do so that they don't bother me a lot!
#1: I DISLIKE weaving in ends. Yes, really! I know some crocheters find weaving in ends calming, meditative, relaxing, etc. Some crocheters have their significant other (not necessarily a crocheter) weave in ends. (I've seen that in person!) Some crocheters just "bite the bullet" and do it. Some crocheters simply work over the ends, and don't really weave them in. I'm a person who needs to weave in ends, unless (and this is a BIG unless) there is some way to make the ends part of the design. Like using them for fringe. When I'm designing a multi-colored scarf, or afghan, I try to do it so I can use the yarn ends, at the end of each row, as fringe. I've done that with sweaters, too. So sometimes I can get around multiple ends needing to be woven in. But, many times, when I've designed a multi-colored afghan for a magazine or yarn company, I have to weave in ends. Many ends. Many many ends. There were a few afghans that I've designed for various publications/yarn companies, that had many hundreds of ends. So why, I can hear you say, don't you weave them in as you go - either as you finish the row, or as you finish the motif? Well, I think that if you weave in ends as you go, or as you finish the motif, and then you figure out that you have made a mistake somewhere, and you need to frog (rip it, rip it, rip it) part of the piece, it will be really difficult to undo, because of your woven-in ends. So you'll need to cut something, and it will be a tremendous waste of yarn. (Especially if you have a limited amount to use for the project.) And if you just work over the ends, without weaving them in, you'll be making the fabric weak, and the ends might be able to slip out. Not great if your pattern is to be photographed and published. (I did have an errant yarn end that I discovered in one of my afghans that was published. Luckily, the photo didn't show it! Now I quadruple check my designs when I send them in!) What I do,when I'm faced with many, many ends to weave in, I collect them all - maybe counting them as I go, and put them in a plastic bag and take a picture of all the ends when I'm finished. Just so I can remember I did it! And maybe brag about it to my class.
A funny story about weaving in ends (at least I think it's funny) - many many years ago, (in the early 1990s), I designed and crocheted a granny square afghan for a friend's baby-to-be. 100 squares, 3 rounds each, each round a different color. Do the multiplication. 6 ends per square, times 100 squares equals 600 ends. Luckily, I used a joining method we now call Join-As-You-Go, so there were no added ends from sewing the pieces together. I remember I did most of the crocheting while I was watching the Olympics, because I was in school at the time, and watching the Olympics was the only time I gave myself to relax and not do homework. Well, I finished crocheting the afghan, the Olympics were over, but I had all those ends to weave in. And school work was calling. I never did find the time to weave in the ends - and the afghan is still in my family room, years later. Every once in a while, I weave in an end or two, but it's a better story if I don't.
Here's a picture of a part of the afghan, with the ends sticking out. (It's still usable, even with the ends.)

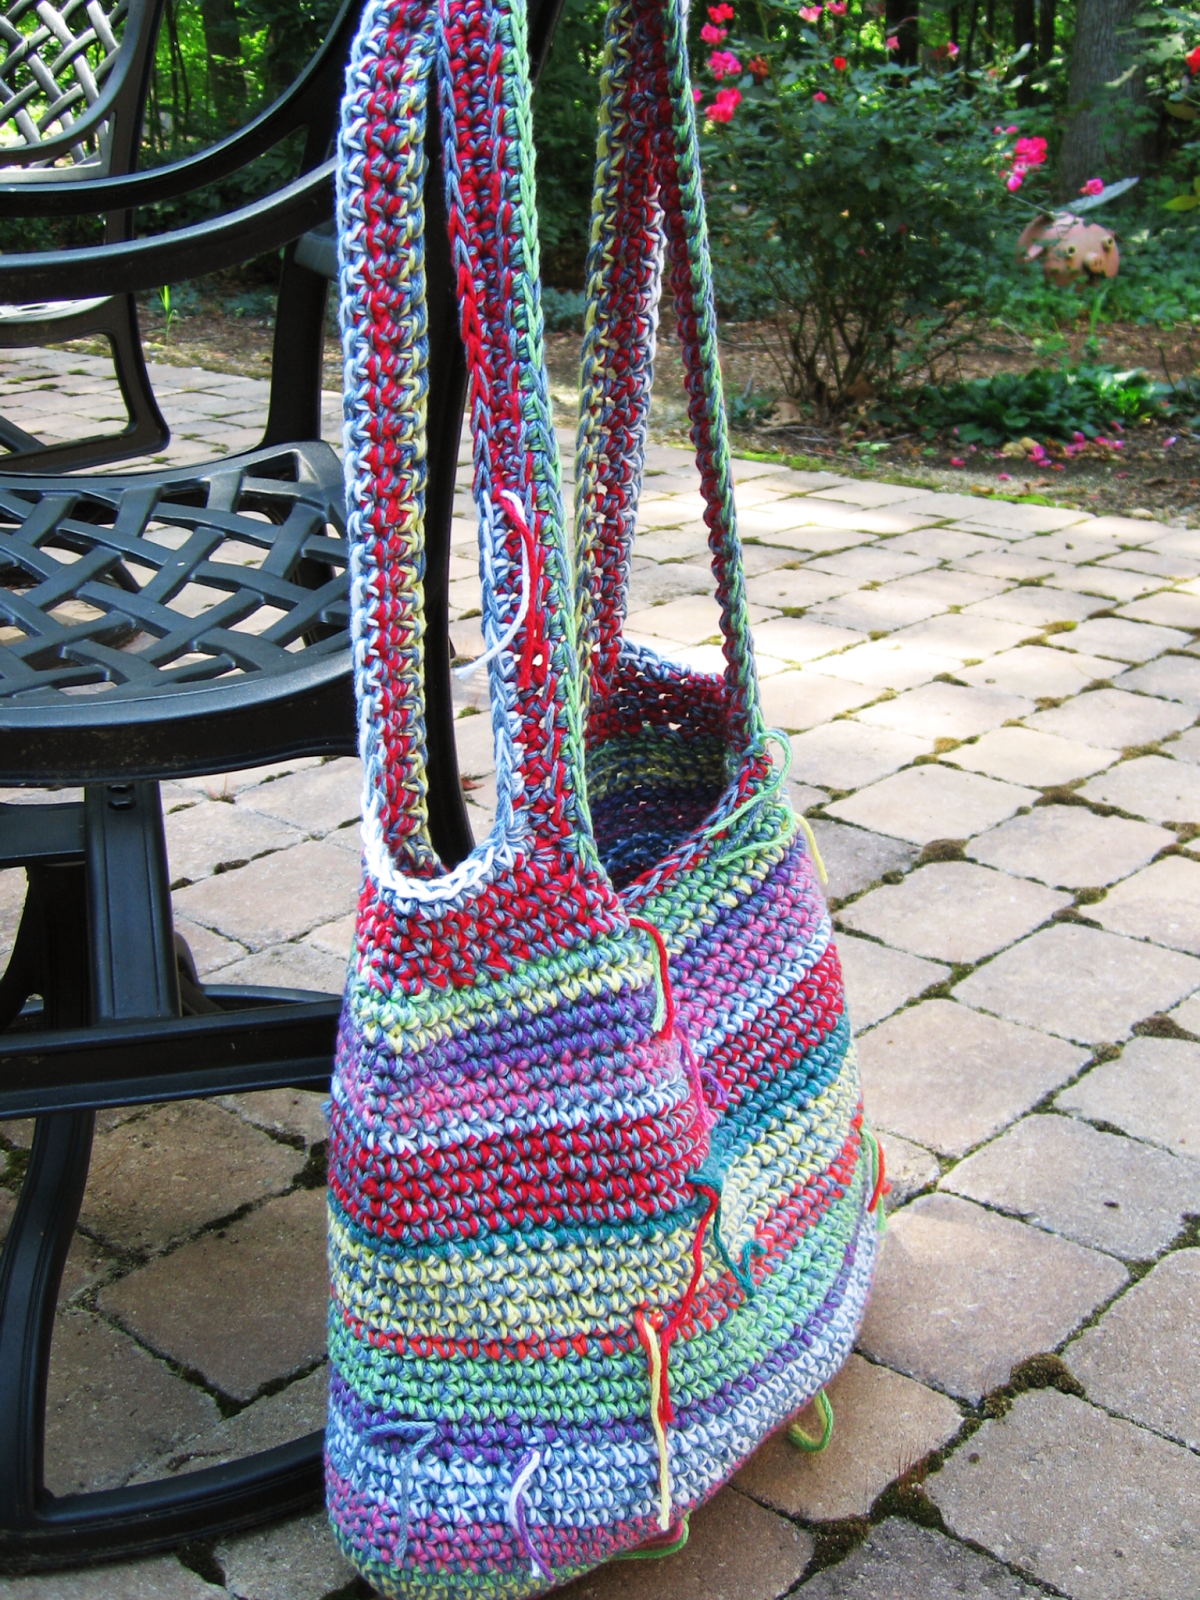
And here is a picture of a tote bag I designed with the ends acting like fringe (so I didn't have to weave any in!
#2: I DISLIKE working into a long (or short) beginning foundation chain. (Really, any chains - even turning chains!) Whether the yarn is easy to work with, or not, there's always a good chance of missing a chain, or working more than one stitch into a chain, no matter how careful you are. And then, when you get to the end of the long foundation chain, and your 245 or so stitches, you find out that you either have too many chains, or too few chains, or you missed a few chains in the along the way. What to do? If you have too many chains, you can easily undo them from the beginning of the chains. Very carefully, unknot the slip knot, and undo one chain at a time. It's possible. But if you have too few chains, you don't have too many options. You can frog it all, and start over. (Which is what you should do when you skip some chains along the way.) Or, if you know how to work foundation stitches, you can use those to add on the chains and the stitches that go in them. Or you could start with foundation stitches instead, which would make counting your foundation stitches that much easier. Because your foundation would be STITCHES, not chains! When I found out about this technique, (and it was many, many years ago - in the 1970s!) I thought it was the best thing ever! And I still do. I'll explain this technique I'm talking about.
Foundation stitches are NOT the basic stitches that you learn when you're beginning to crochet. But they are closely related. Usually, when you begin a crochet pattern, you crochet a long chain, then work your stitches into that long chain. With foundation stitches, you work just one chain, and then crochet your stitch into that one chain. *Then you work another chain, and crochet your next stitch into that chain. And repeat from *. So, you are working each chain and the stitch that goes into it, before you go on to make another chain and another stitch. That should tell you a few things. 1. You just have to know the basic stitches - chain, single crochet, double crochet, and maybe half-double crochet and triple (treble) crochet. 2. When you use foundation stitches, you don't have to worry about skipping a chain, or working two stitches into a chain, or having too many chains, or just not having enough chains. These are 2 big advantages to foundation stitches! But there are other advantages, too. Using foundation stitches makes the first row much more elastic then it is when you crochet a long chain and work into that chain. Much more elastic. It's easier to count your stitches, also. So instead of counting chains, you can count your first row of foundation stitches. If you dislike working into a long row of chains, you can work a row of foundation single crochet stitches, pretend that is the chain row, and work your pattern stitches into the foundation single crochet stitches. Much easier. Much easier!
Here is a picture of the three basic stitches, dc, hdc, and sc, but worked as Foundation stitches - from left to right: Foundation double crochet (fdc), Foundation half-double crochet (fhdc), and Foundation single crochet (fsc).

If you look closely, you'll see the tops of the stitches on the right side of the strips, and the chains (the bottom of the stitches) on the left side of the strips. This is how you usually work the strips of foundation stitches, vertically, instead of horizontally, which is the way you usually do when you work into a long chain.
Not only can you work the basic stitches as foundation stitches, you can work stitch patterns as foundation stitches. Say you need to work a shell pattern, and you're supposed to work 5 double crochets into one chain - you know what that does to the chain, and the ones next to it. It stretches the chain you're working into, and shrinks the chains next to it. So if you have to work into the next chain, that's going to be difficult. It's much easier to work 5 double crochet stitches into a foundation sc. And it's also easy to work the shell pattern as a foundation stitch pattern.
Here is a picture of three stitch patterns worked as Foundation stitches.

From left to right: a filet stitch pattern, a double-sided shell pattern, and a shell pattern.
How do you do that? you ask. Well, this is your lucky day. I taught a Craftsy class on Mastering Foundation Crochet Stitches. In it, I explain all this, and more! All about Foundation Stitches and Foundation Stitch patterns. When you enroll, you get 7 lessons on Foundation Stitches, and directions on how to make them, and patterns and stitch diagrams for different Foundation Stitch patterns. You also get to watch the class as many times as you want - you can ask me questions and I'll answer, you can join in discussions, you can post pictures of your projects, and you will come away learning all about Foundation Stitches. Your class is yours, forever! And, because you're reading my post, I'm going to give you a 50% off link to the class. Here it is:
Oh, here are two pictures of projects in the class - patterns are included in the class materials:
A Granny Rectangle Tote:

And a Basket:

This was worked with 2 strands of yarn throughout - so there were 4 ends to weave in. Not too bad! (The Foundation Stitches are worked for the handles.)
Well, I could write more and more about Foundation Stitches, but I know you are anxious to get on to the next step on the Blog Tour. So - I'll write some more about Foundation Stitches soon, in another post. Keep checking back.
Meanwhile, don't forget to check the other designers on the tour today, and thank you for visiting with me! Hope to see you in class!
And thank you to Amy and Donna for arranging this great blog tour!


